1Download Photos from iPhone to laptop Using Email
Another option that you have is to email the photos to yourself, which we have detailed below.
Step 1 - Go to your iPhone’s “Photo” app, tap on the “Select” button at the top-right, and select any of the photos that you want to transfer.
Step 2 - After selecting all of them, tap on the sharing icon. From here, tap the “Mail” option.

Step 3 - The Mail app will launch. Simply enter your email address and tap on “Send”.
Step 4 - Now, on your computer, open up your email account and you will see the email containing your iPhone’s photos.
Note
If you aren’t connected to the internet and you have a lot of photos that you want to transfer then this can take a while, although it’s one of the many methods for transferring photos.
How to Download Photos from iPhone to Windows Laptop
The methods that we are going to detail below can only be used on Windows Laptops.
1 Download Photos from iPhone to Laptop Using AutoPlay
The next Windows method is going to be taking advantage of another built-in Windows feature – AutoPlay.Sponsor ads:iOS Multiplayer Games for iPhone & iPad 2019
Step 1 - Connect your iPhone with a USB cable and the “AutoPlay” window will appear.
Step 2 - From the list of options, click on “Import Pictures and Videos using Windows”.

Step 3 - Select a file location to have the photos imported to and in no time at all, they’ll be transferred and available on your computer.Sponsor ads:Turn Your iPhone into a Webcam 2019
Note
Unfortunately, AutoPlay was removed in Windows 10 and has now been replaced by the “Photos” app which works very differently. However, this change has added a lot of organization to the photos.
2 Download Photos from iPhone to Laptop Using Windows Explorer
The first Windows exclusive method utilizes the Windows Explorer feature and is relatively easy to use.
Step 1 - Connect your iPhone using a lightning cable and from your taskbar, click on the “This PC” icon.
Step 2 - Then you should see your iPhone listed. Double-click on it to proceed.
Step 3 - Open “Internal Storage > DCIM” and you will then be shown all of your album folders.
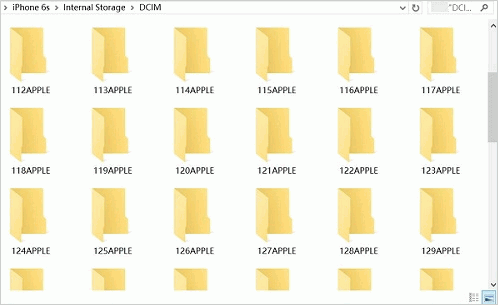
Step 4 - You can either copy the specific photos over by going through each folder or simply drag-and-drop all of the folders over to transfer them all.
Note
The downside to this is that the folders aren’t organized very well meaning that if you want to transfer a specific photo, you’ll struggle to find it.
How to Download Photos from iPhone to MacBook
The methods that we are going to detail below can only be used on Mac computers.
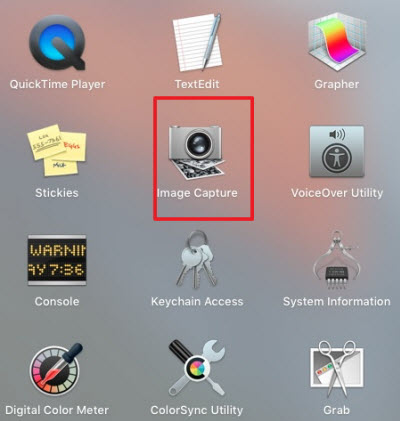
1 Download Photos from iPhone to MacBook Using Image Capture
Image Capture is a very underused tool by Mac users and with the steps below, we’ll be showing you how to download pics from iPhone to laptop with it.
Step 1 - Connect your iPhone to your MacBook and open up the “Image Capture” app.
Step 2 - Choose the pictures you want to download and then click on Import. You can also click on “Import All” to have all of them transferred.
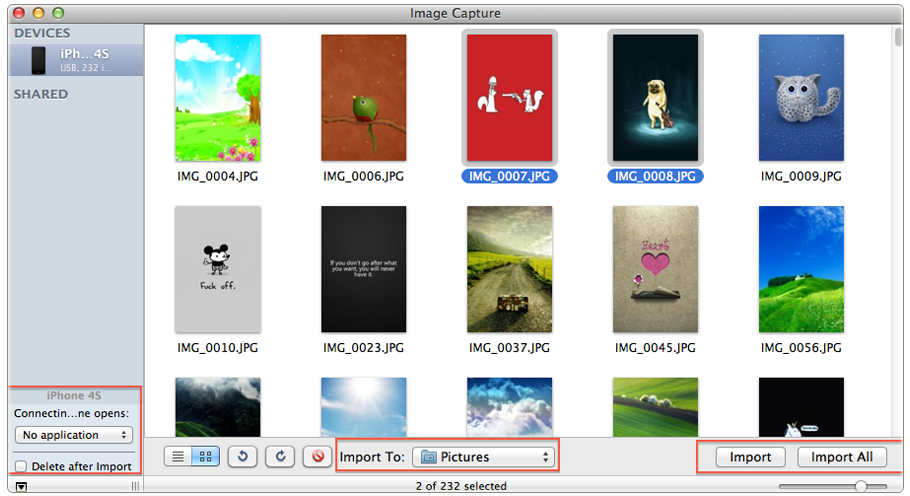
Step 3 - Lastly, the photos will be transferred to your MacBook.
This is a very handy built-in Mac tool which not everyone is aware of, so it’s definitely worth taking advantage of.
2 Download Pictures from iPhone to MacBook Using Photos App
The final method that we’ll be discussing in this article is with the Mac Photos app, another built-in feature for Mac users to take advantage of.
Step 1 - Start by connecting your iPhone and making sure that the most recent up-to-date version of iTunes is installed (iTunes is required for this method, although isn’t directly used).
Step 2 - Open the “Photos” app and click on your device from the left panel.
Step 3 - All of your photos will now be shown. Select all of the photos that you want to import to your Mac computer.
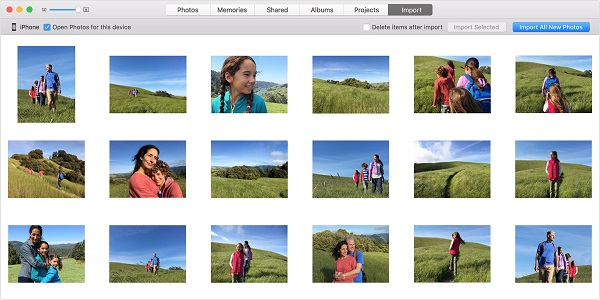
Step 4 - After selecting your photos, click on “Import Selected” and let the app take care of the rest.
Again, this is a relatively easy method to follow for downloading your pictures from iPhone to laptop.
To Conclude
In this article, we have shown you a lot of different methods for downloading photos from iPhone to laptop so that regardless of the type of computer you’re on or any restrictions which you are under, there is a method that you can use.Sponsor ads:
Gihosoft Free iPhone Data Recovery:https://www.gihosoft.com/iphone-data-recovery-free.html
Gihosoft iPhone Data Recovery Free
Free iPhone Data Recovery Software for Windows/Mac
Recover up to 12+ types of files, including contacts, SMS, photos, WhatsApp, Viber, notes, etc.
Restore lost data from iOS devices directly or from iTunes and iCloud backup
Recover iPhone data lost due to iOS upgrade/jailbreak, accidental deletion, device lost or broken
Support all the latest iPhone, iPad and iPod Touch
Both Free and Pro version.
If you lost data after you updated to a new iPhone, you can always use Gihosoft iPhone Data Recovery to get the data back from the old iPhone or backup.You may also like: iphonerecovery.com
With Gihosoft Android Data Recovery, no longer afraid of data loss!
Must read:Youtube video downloader for pc
Gihosoft RePicvid Free Photo Recovery Software provides a free photo recovery software for windows to help users recover the deleted or lost photo for free.
Jihosoft Android Data Recovery: the best Android Data Recovery software for Windows and Mac to recover deleted contacts, messages, photos, videos, WhatsApp and etc from Android devices.Tips:How to transfer messages from iPhone to iPhone

No comments:
Post a Comment